
For those who don’t know what the fuss is about, the newer european Rancilio Silvia models (usually referred to as E, such as the older V5 E or the new V6 E) feature an “Universal Energy Saving” device, produced by a company called Gicar. In other words – it’s a power saving feature and it makes sure the device turns off after 30 minutes of inactivity. The stock On/Off switch is a digital one and doesn’t hold it’s On position (jumps back to a neutral position after pressing). This makes it really difficult to use with a smartplug, as once the machine turns off you’d have to press the switch again to turn it back on.
I’ve been keeping the switch in the On position with a piece of rubber thick just enough to fit in the gap and hold it in place. Did so right after i got the machine in June and it worked perfectly so far. It allowed me to be using an Eve Energy smartplug – which basically means i’m using the European model together with a HomeKit compatible smart-plug in order to have the machine hot and ready in the morning. I decided to move from my temporary solution to a more permanent one.
I had two minor issues with it so far and i felt the urge to improve it. Firstly, i couldn’t use the switch as i’d have to take out the rubber and put it back each time. Temporary solutions do work, but the rubber piece would slip out and leave the switch in the Off position. This has only happened twice, but waking up to a cold machine isn’t great.
I sure hope this won’t happen again as i’ve ordered a new, genuine ON/OFF switch from an M model, from the US and decided to replace it.
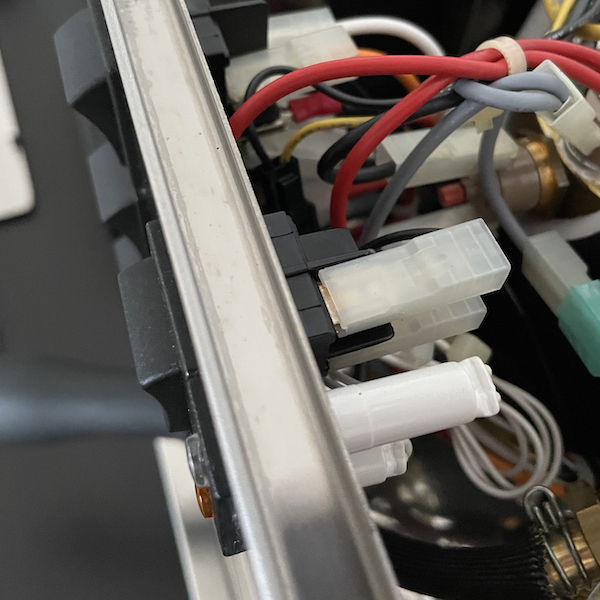
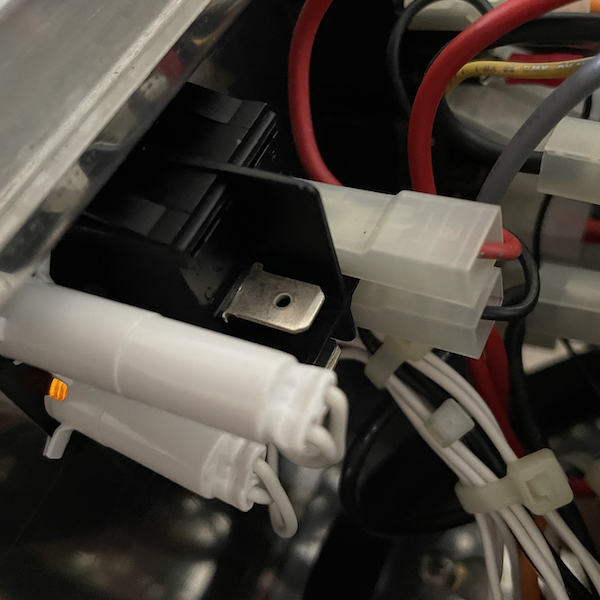
The installation was pretty simple. Unplug the red and black cable, pop the switch out and plug the cables into the new switch to see how it works. And as you’d expect, it works.
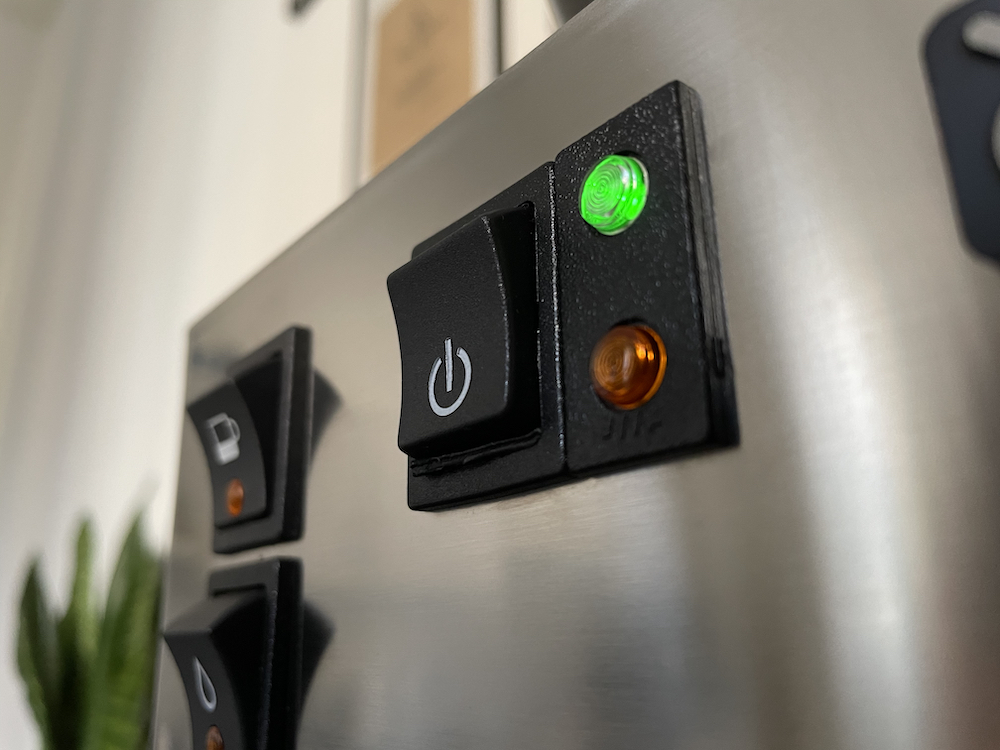
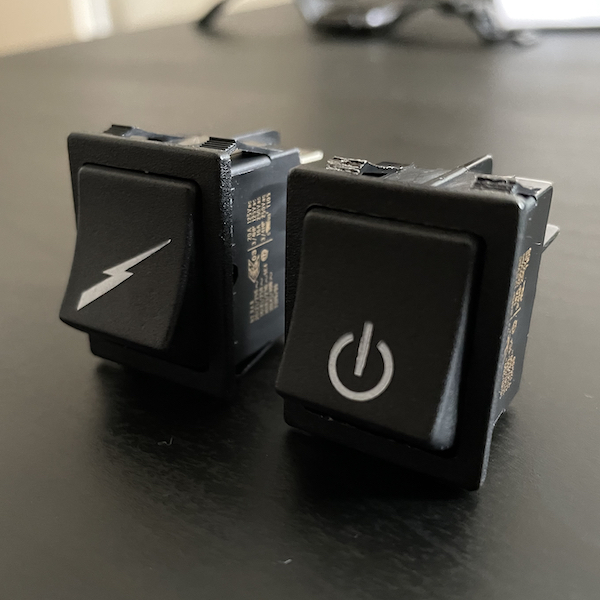
It works, but looks too ordinary now. I still somewhat preferred the look with the original icon from the European model (instead of the bolt icon), so i’ve swapped the front plate of the M switch from the European switch. The results are just as intended.
I’ve created an automation and let the plug turn on at 5:00am, turn off 25 minutes later and turn back on after 2 minutes. Repeating the automation at 5:27 allows me to have the machine warmed up for at least an hour at 6:00am.
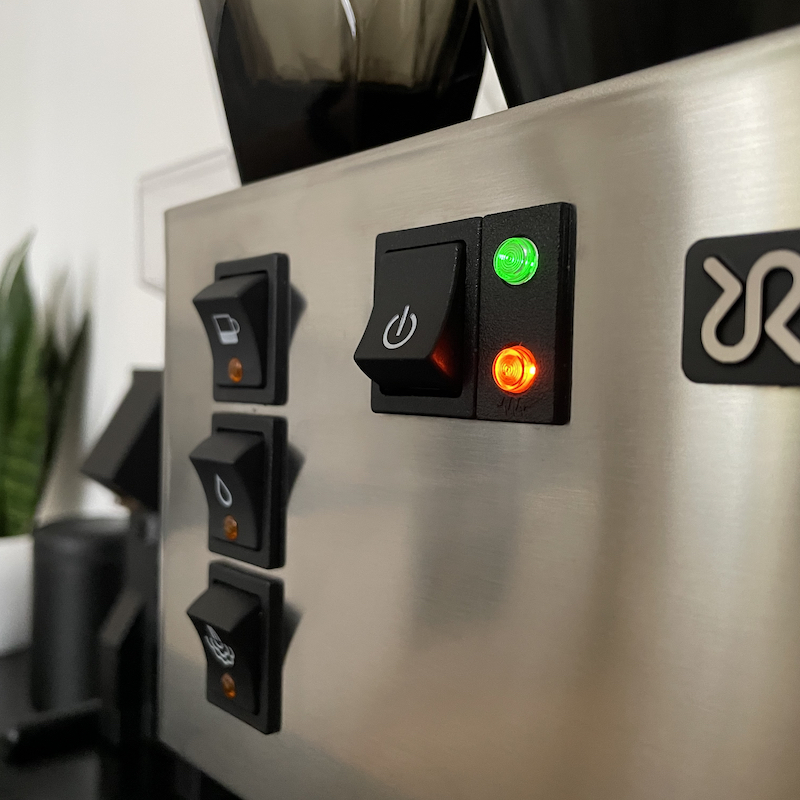
As result i now have an ON/OFF switch that still resembles the original, but stays in place without having a temporary appearance. It lets me control the machine with a smart plug, but also with the switch itself.
This still doesn’t solve the 30 minutes auto-off feature, but i will eventually look into it some day as well.
Is it worth the effort? Yes – for me personally, i’ve one less thing to worry about.
Jaroslav
March 5, 2021
Well done and looks perfect 🖤
March 5, 2021
Thank you! 🥰
April 7, 2021
Great Mod Jaroslav, I just got myself an ON/OF Switch and want to try it too. I have a question: how did you manage to change the front plate of the switch? Was this hard to do?
April 7, 2021
Hi Thomas,
firstly, well done and thanks for asking! Secondly, it’s super easy. It’s held by two hinges on each side. If you insert a thin flat-head screw driver between the frame and the front-plate, the enclosure of the switch will bend under slight pressure and allow the hinges to release the front plate one hinge after the other. The plastic is pretty durable, so don’t be afraid of breaking it, but of course – also don’t use too much strenght, only slight pressure is enough. There’s a spring inside of the M-Model switch, take the front-plate off slowly to see and remember where the spring is located (the same goes for the E-Model switch). Good luck!
Jaroslav
June 2, 2021
Im also Jaroslav.. 😂
June 2, 2021
Hi there namefellow, thanks for stopping by 😊
July 23, 2021
It looks awesome. I’m tempted to do the same thing on mine. Just curious how the machine behaves if you always let the power button on after changed to the manual one? Does it simply turn off after 30mins, and you’d need to turn it off and on again to turn it on the next time?
July 23, 2021
Hi Julian, thank you!
Basically, yes. It behaves as if the stock switch was kept pressed in the On position. The machine would still turn off after 30 minutes, but once I’d turn the smart plug off and back on, the machine would turn on again. This wouldn’t work on the stock switch unless it was kept pressed in the On position somehow (hence the piece of rubber). The switch does still function just like the stock switch, so you’d be able to turn the machine On/Off using the switch as well. I kept it in the On position and controlled power solely using my phone. Thanks for asking!
Jaroslav
July 23, 2021
Thanks for the quick and detailed reply.
Sounds great, yeah, I’ll get one and replace it. Though in my case I’m in Australia and I actually had the choice but I chose the E version instead of the M. I was newbee when I bought it so didn’t realise I can warm it up simply with a smart switch. Your solution is just neat.
July 23, 2021
Anytime! I got mine from Stefano’s Espresso Care, the shipping was really fast. Let me know how it goes, good luck!
July 29, 2021
Hi Jaroslav,
Just received the manual switch and replace it on the machine!
It works perfectly but just a little bit different than I imagined. Now you need to turn and off to switch the machine on or off.
I guess that’s why the manual switch has 4 connectors instead 2 on the auto switch. Ideally all 4 connectors should be connected so both turn on and off action should be able to send a pulse to the controller to trigger machine on and off.
That’s my understanding though, may not be correct. But anyway, I’m happy with it and now I can use a smart plug to control it.
Thanks.
July 29, 2021
Hi again Julian, and well done!
I’m sure many of us wish it was that simple, but you’d need to override the controller somehow as well. Some owners would get a bunch of cables and connectors and somehow made it work, but the machine ended up ignoring the On/Off switch completely and would stay powered on unless the smart plug was turned off. There’s simply no way to avoid fiddling with the controller for it to function properly. It’s not exactly how a normal On/Off switch would work and you’ll need to click it twice sometimes, but at least you can control the machine both remotely and with the switch in case you don’t want to go looking for your phone.
December 21, 2021
How did you order this switch!
December 22, 2021
Hi Nick,
I ordered it from Stefano’s Espresso Care.
Thanks for asking and I hope that helps!
January 4, 2022
Is this it? They may not have changed the picture. Thanks!
https://www.espressocare.com/products/item/rancilio-silvia-main-power-switch-for-m-version
January 5, 2022
Hi Nick,
That’s the one, yes. Unlike the E version, the M version still has a bolt icon. You can swap the switch cover easily if you prefer the original look.
Jaroslav
January 18, 2022
Hello Jaroslav,
Great write up, thanks. I have the V5 and I am looking to bypass the 30min timer also, your idea with the switch is really nice.
One question, do you think it could work by just removing the spring from inside the original switch? Instead of buying the M version switch. Just curious as to what you think about this.
Also, is the Amber PID easy to fit with basic skills? The temp only model.
Look forward to your reply.
Ben
January 18, 2022
Hi Ben!
I thought of that as well, it probably would work indeed! I personally still wanted to use the switch, so I went with a new switch instead.
I’m sure you’ll manage and install the kit without issues. Auber provides really extensive step-by-step sheet with clear instructions. Spend some time on reading through those while you wait for the kit to arrive, it will take away some of the anxiety.
Thanks for asking, I hope that helps!
Jaroslav
January 18, 2022
Hi, thanks for your quick reply.
It sounds reassuring that it’s not too bad to fit it. I think I’ll order one.
I also thought about buying one of the other switches, on the left of the face, maybe the brew button for example and just changing the little face panel like you did?
Are all the switches the same?
Thanks so much.
Ben
January 18, 2022
No worries!
I can’t remember exactly, I wish I could take a look and compare them but I don’t own my Silvia anymore. Those switches have LED indicators, that should probably not be a big issue but the switch could be wired for a different purpose.
I wish I knew more, sorry!
January 18, 2022
Thanks again for you kind help. I’ll give it a go.
Well done for your blog, I’m sure lots of people will benefit from you site.
Take care and good luck!
Ben
January 30, 2022
Thanks for that great guide!
I wonder if there are any other places to order this switch from as shipping to Germany alone costs $ 17 (so more than the switch itself).
Or I’ll have to go with an older switch (with built in LED) and the single amber LED next to it.
February 2, 2022
Hi Alex,
Thank you for reading! The shipping was pricey, but I couldn’t find an OEM switch anywhere in Europe.
Jaroslav
August 2, 2022
Hi Jaroslav
I’m in a similar position I have an older Silvia that I have fitted with an Auber PID and control it with automation on an external smart switch at the wall. I’m looking to remove the external smart switch by installing a Shelly PM Plus inside the Silvia. But for this to work nicely I am actually after the new momentary press switch.
This is not available as far as I can see yet as a spare part. Are you able to send me a picture of the markings on the original momentary switch so I can try and source one direct?
August 2, 2022
Hi Mike,
I don’t own the Silvia anymore, sorry – can’t take a picture for you. But I’ve found the part on a website I trust – here.
Good luck!
Jaroslav
August 2, 2022
Thank you so much! You lead me on a bit of a journey today, I’ll order up the switch ASAP.
I also found today that my PID, which is just the standard temp model was old enough to have the pre-infusion disabled in a hidden menu.
Looks like this will turn into a fun little project.
August 2, 2022
Anytime!
Oh lucky you! I really like the machine and how modular it can be.
Thank you,
Jaroslav
June 24, 2023
Hi Jaroslav, thanks for the post!
I’m interested in the switch mod and hopefully Stefano’s espresso care will ship to Australia. Just one question, is it ok to have the machine warm up without flushing water through first? I understood that was necessary to ensure the boiler had enough water in it.
June 25, 2023
Hi Dawn,
Unless you steam and forget to refill/flush the boiler after steaming, you really don’t need to worry about whether there’s enough water in the boiler. The boiler is always filled.
Jaroslav
June 25, 2023
Thank you!
September 3, 2023
Hi Jaroslav, I finally ordered the switch from jetblack espresso here in Australia and installation was easy thanks to your instructions (and a handy husband).
Again many thanks for your blog 😊
Dawn.
September 4, 2023
That’s awesome, thanks for letting me know!
Jaroslav
June 30, 2023
Hi Jaroslav,
Understand that you are not using the Silvia anymore. however, I have a few questions. Hope you can provide some guidance.
1. I have ordered an auber PID which is on the way from US. I am thinking if I need to order the on/off switch too. My current flow is to preheat the machine for 25 mins. And then I will flush the water once in order to make the machine still operating for another 30mins. Is that the same if I modify the switch?
2. For the shower screen, noted from a couple comments that the IMS RA200NT doesn’t really fit the Silvia v6. Did you have same issue? Some ppl suggested SR200RNT instead.
Your website really helps. Thanks a lot for the information
June 30, 2023
Hi Nick,
I’ve replaced the On/Off switch mainly for it to work with the Eve smart plug. This didn’t work well with the original momentary switch. Essentially yes, you could continue doing that with a modified switch. The RA200NT fit on my Silvia perfectly, like a glow. Haven’t had any issues, what so ever.
Thank you for asking!
Jaroslav
June 30, 2023
Thanks Jaroslav !
February 13, 2024
Hello Jaroslav
Thank you so much for your article and for the method you use. i’ve also ordered the old on/off switch and I’m waiting for it to arrive in the next few days. If by any chance you have find the way to deactivate the 30 minute economy thing, don’t hesitate to share it.
Thank youuuuuuuuuuu
July 6, 2024
Hi everyone!
It’s unnecessary to buy new switch! You can just remove the upper peace, then there are two springs so when the middle one is removed the switch works just as the us one (but there is still the EU programming).
It works:
Push -> On, stays up -> Push -> On, stays down-> Push -> Off, stays up -> Push -> Off, stays down
July 6, 2024
Hi,
It’s true you could remove the spring from existing switch, but then the switch still won’t click and feel the same way a normal switch would. Your choice of course, I prefer good haptics.
Jaroslav